This one just about beat me. Several times I regretted saving it from the dump and wished it to the devil. But pure stubbornness kept me at it. Weeks and weeks and weeks later I think it may have been worth the aggravation – you tell me.
So, just a foreword – aside from a few decent nut files and a good fret dressing file, I have very few luthier type tools. Almost everything I do is with basic garage tools. Hand saws, jig saws, belt sander, hand held wood rasp, some mid-grade wood chisels, a lot of sand paper, and boat-loads of “eyeballing and trial-and-error”. Half the project is always more about how to make something out of nothing with limited tools – it really stimulates the old hamster wheel.
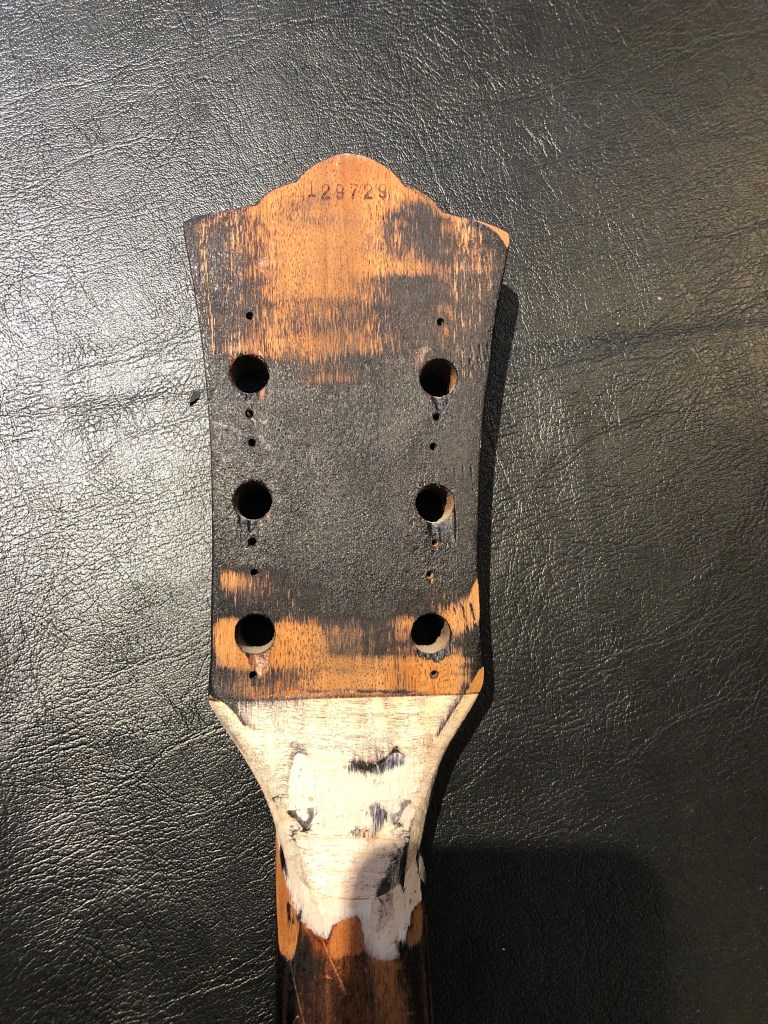
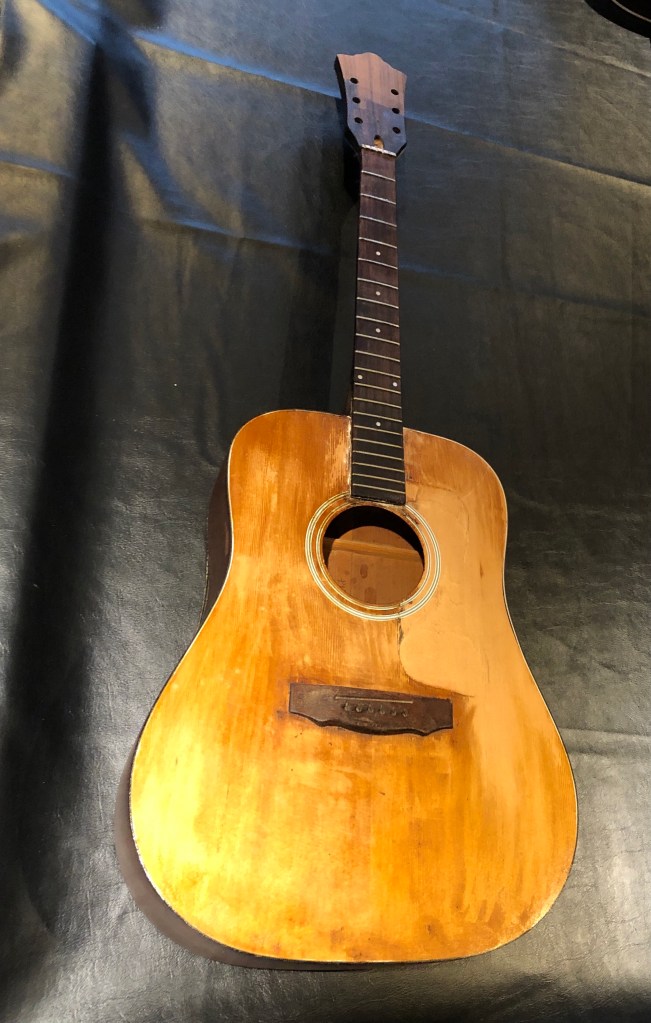
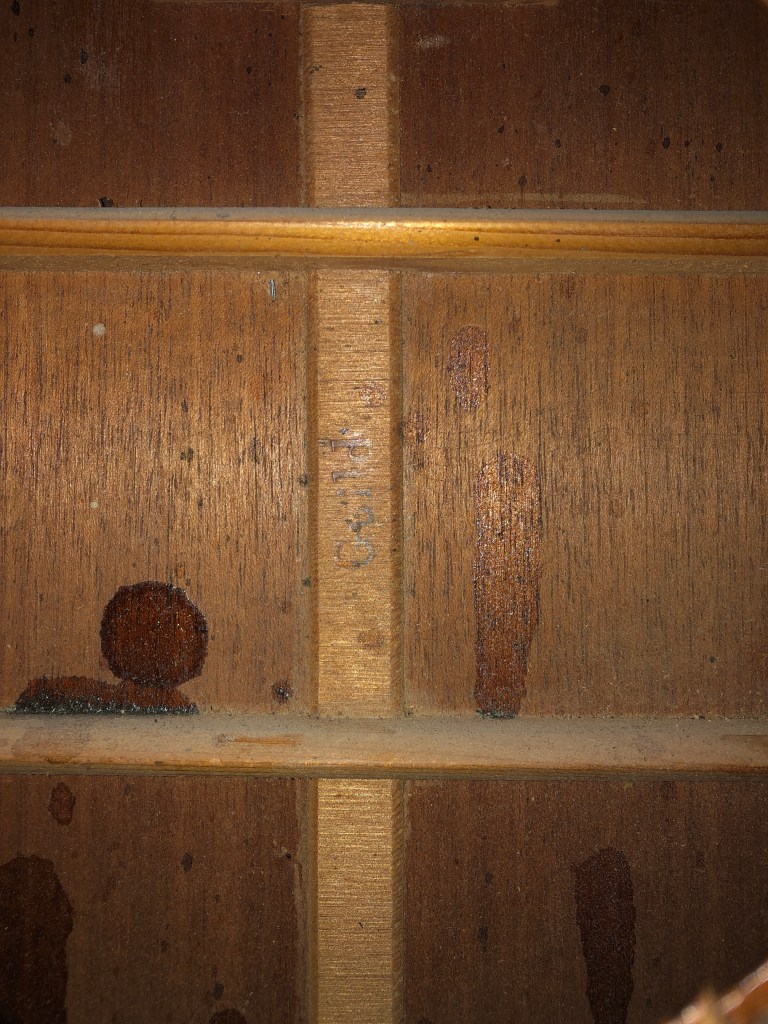
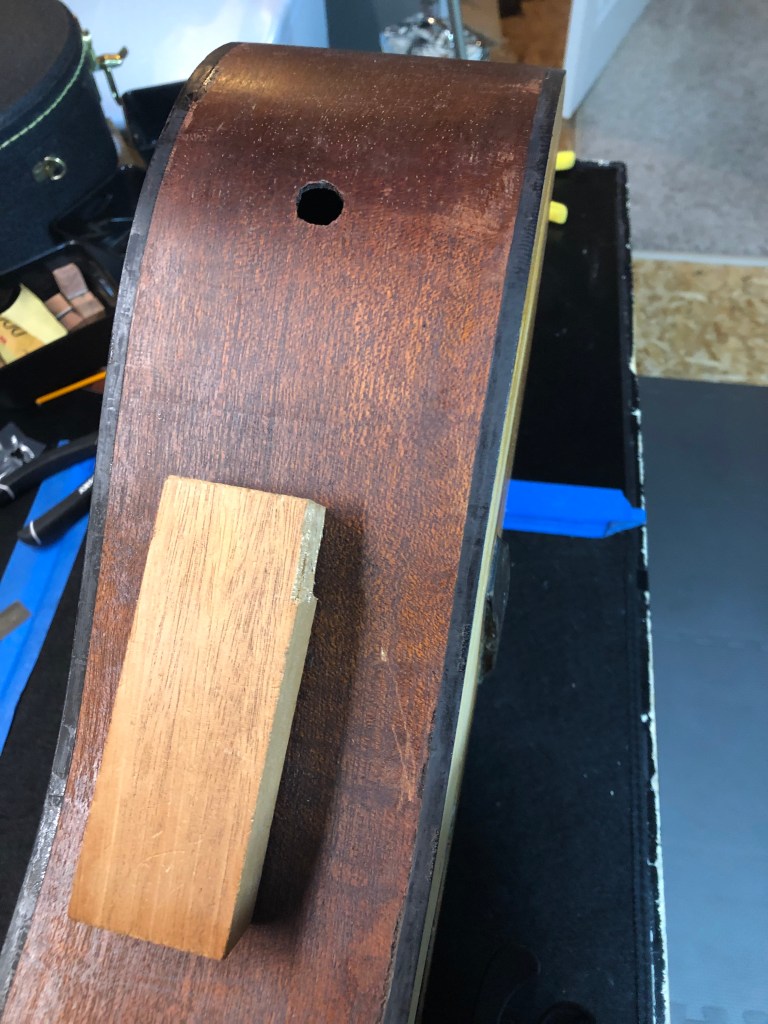
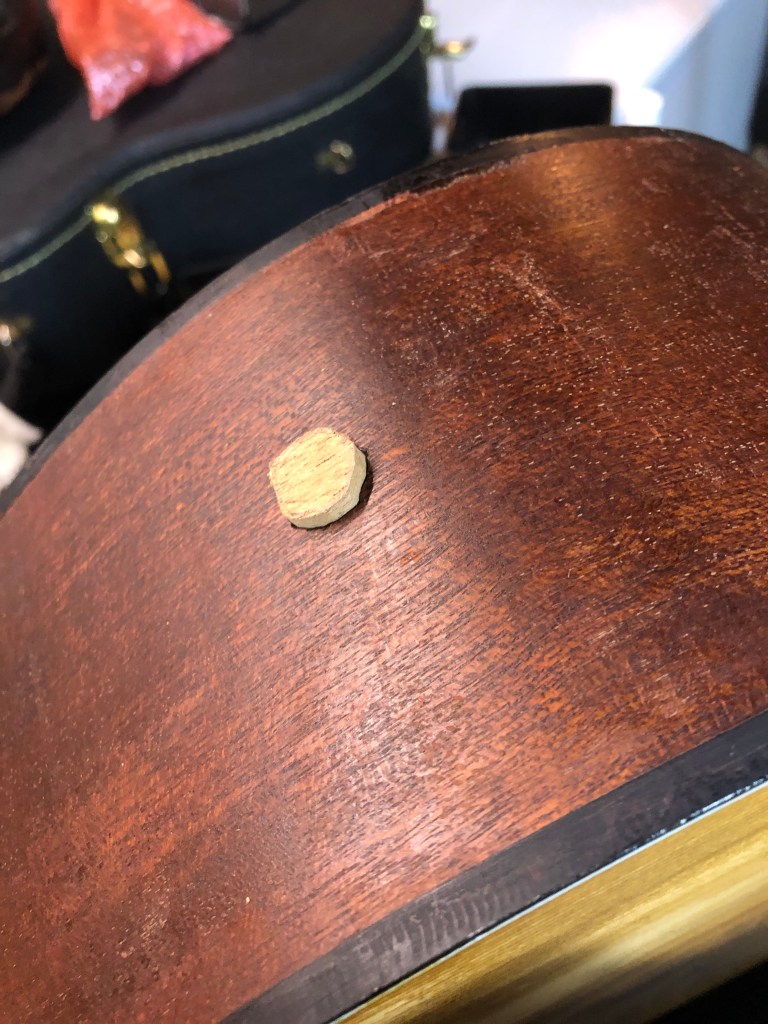
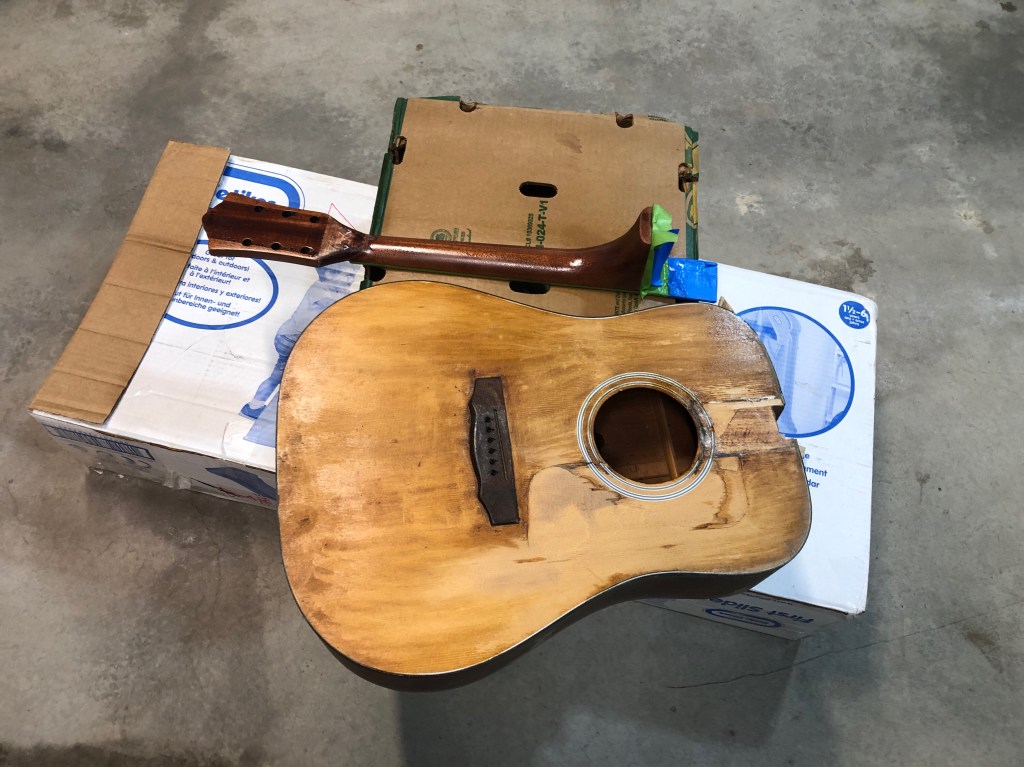
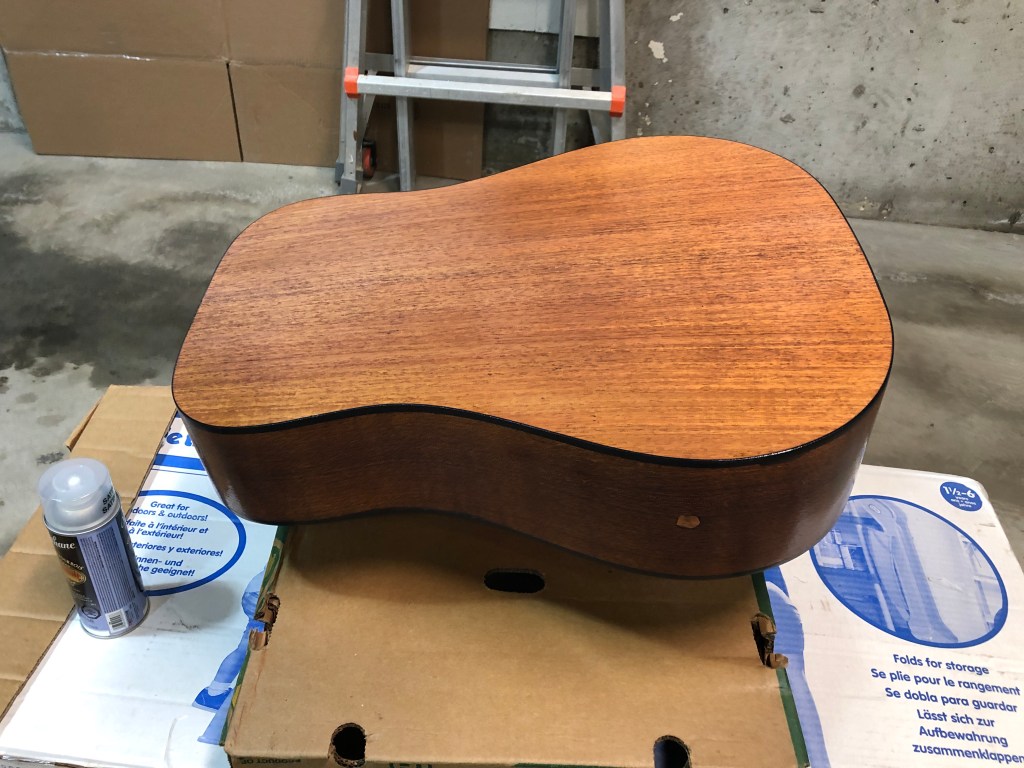
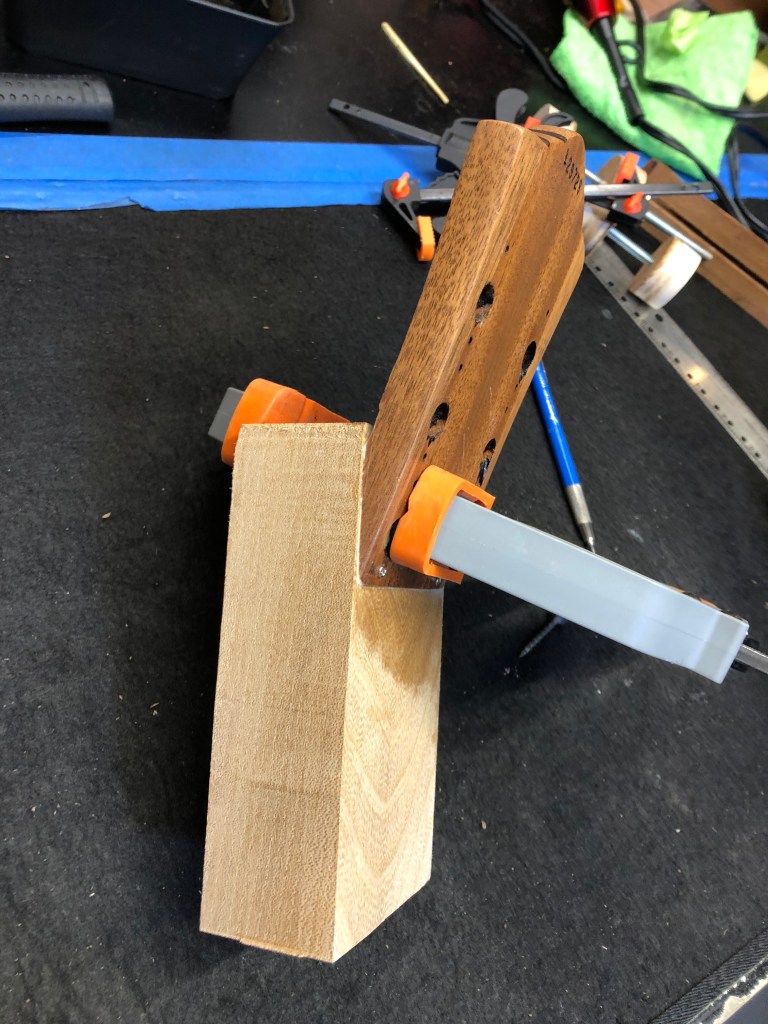
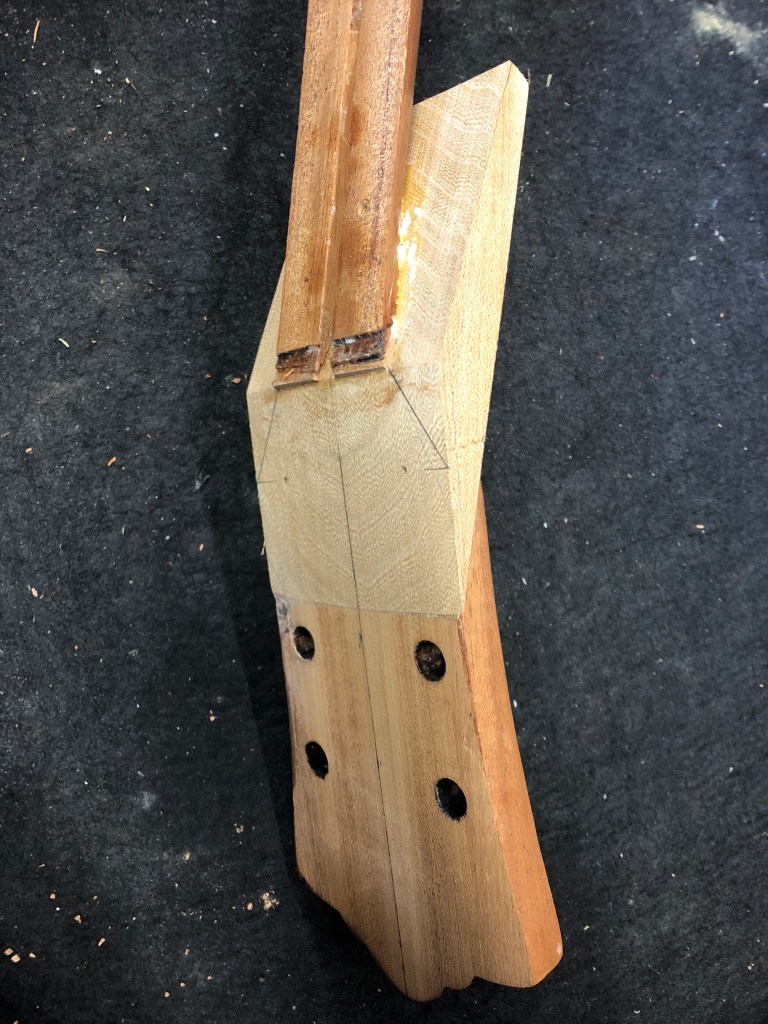
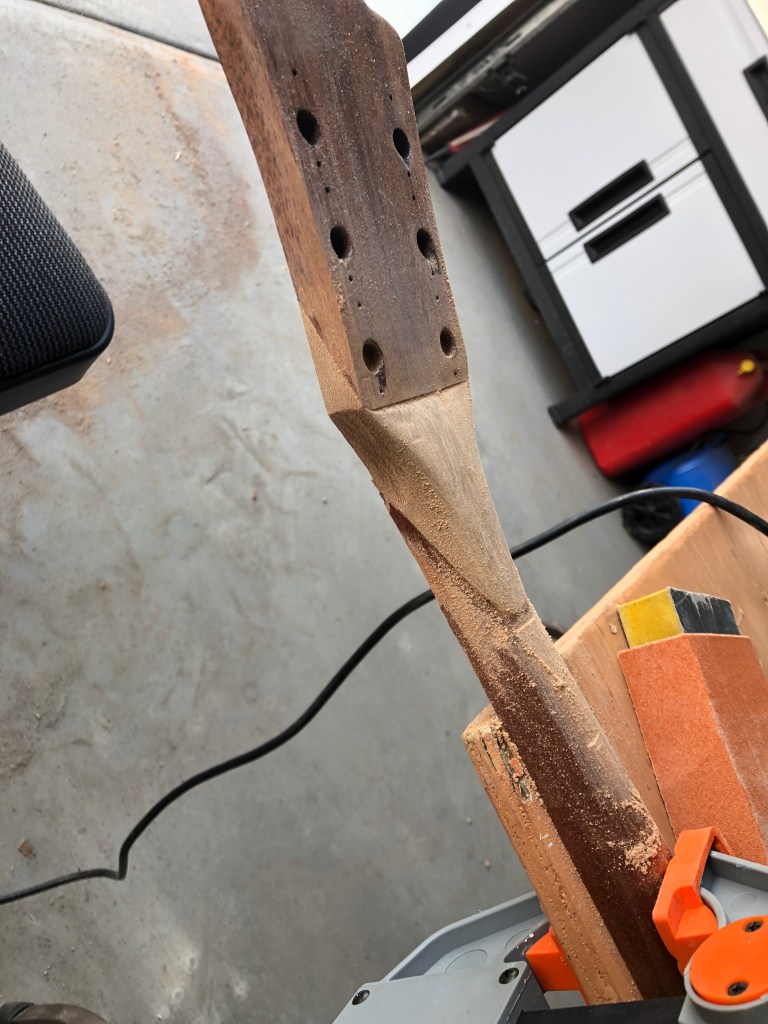
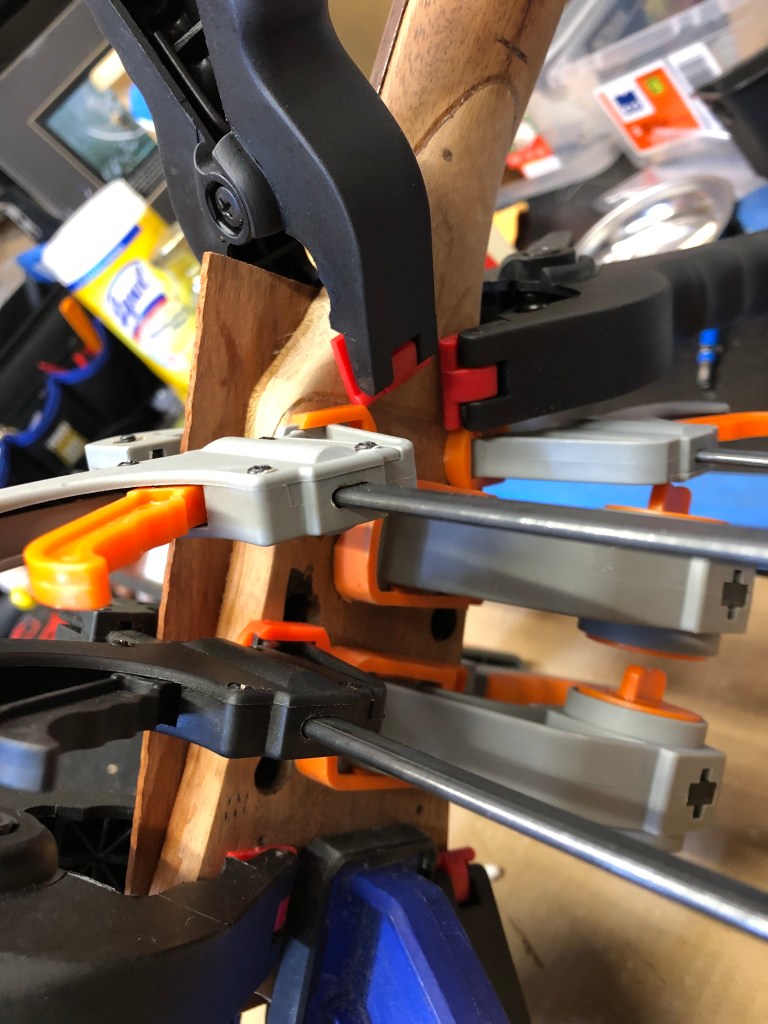
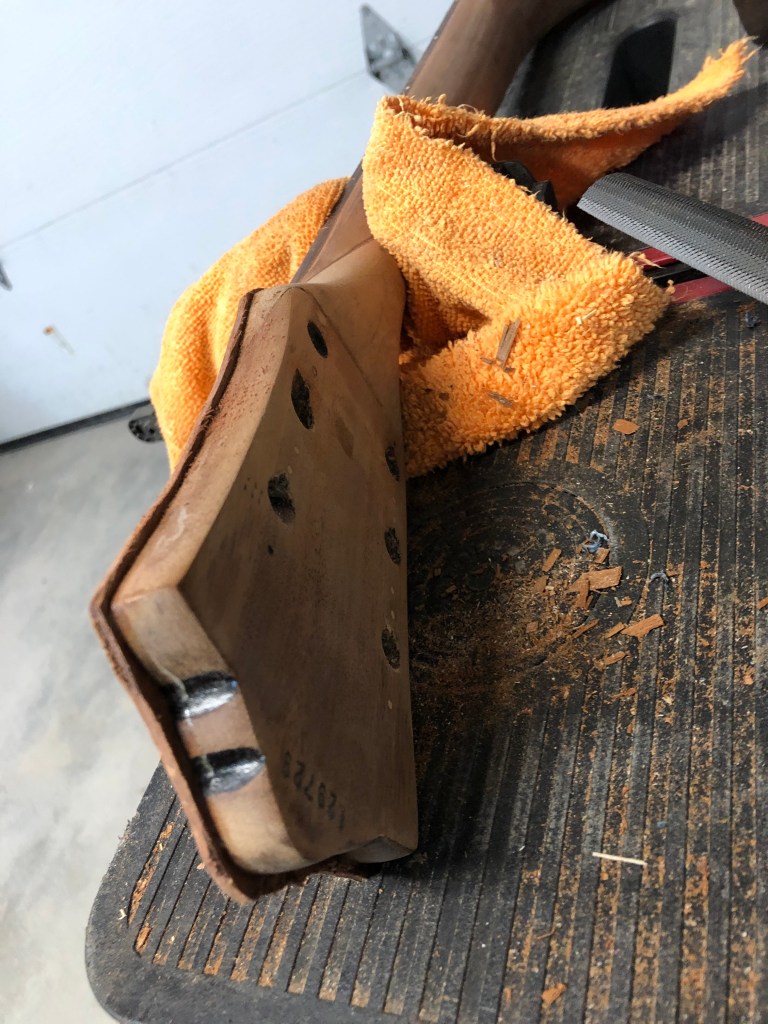
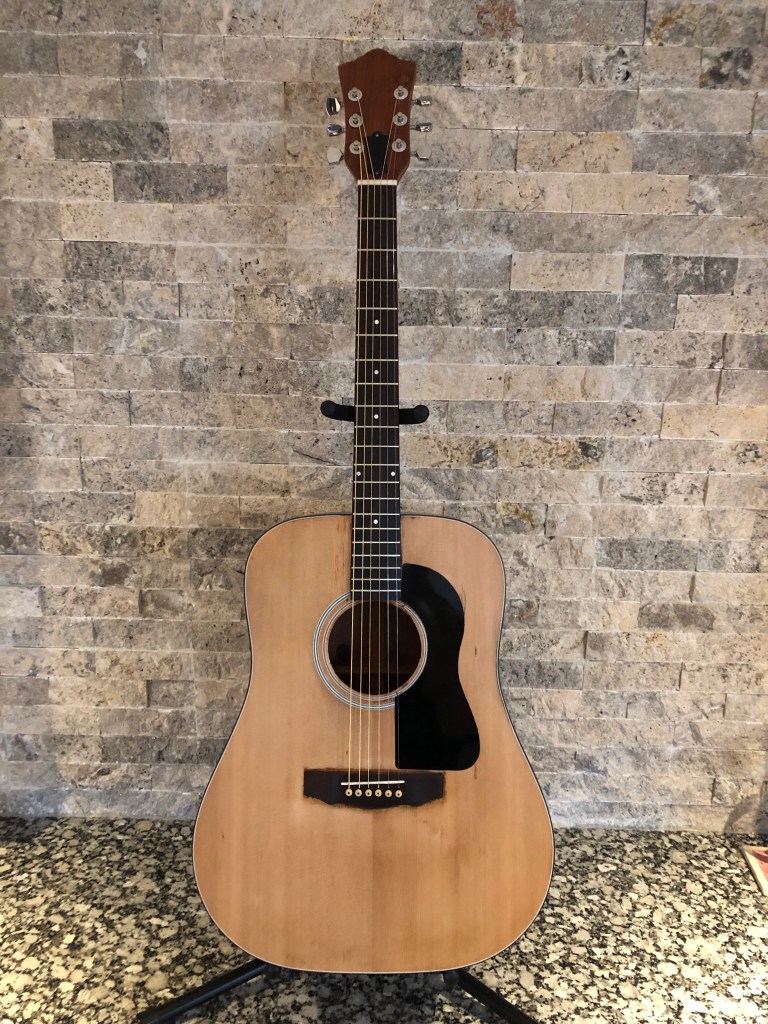
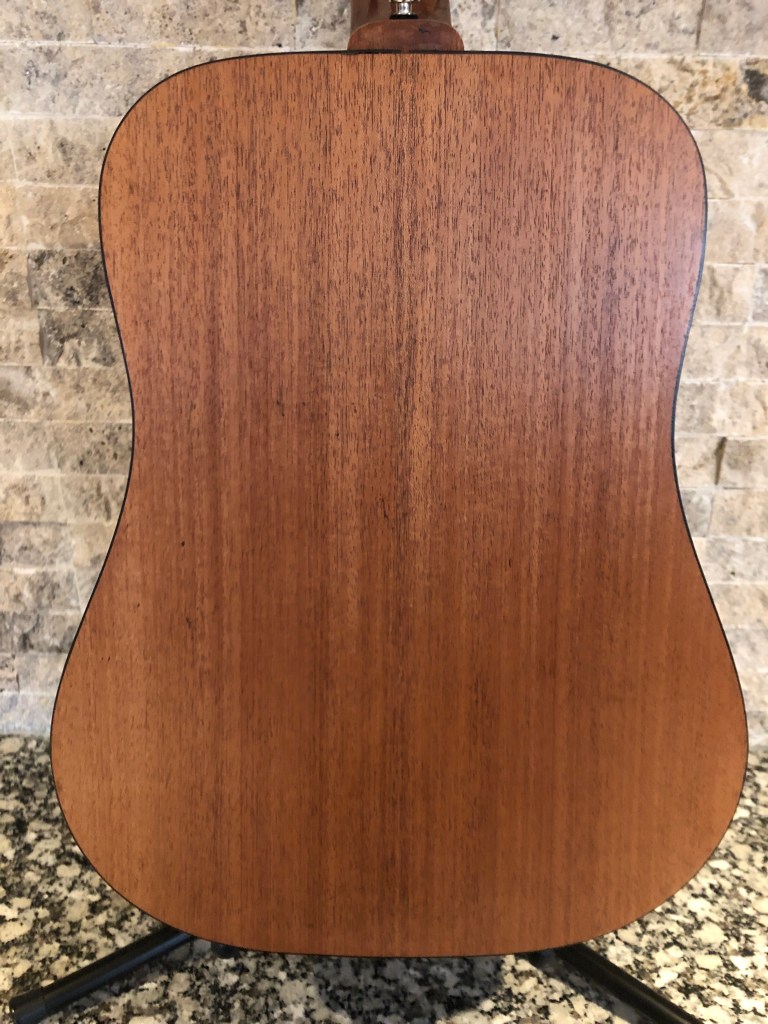
Here’s my starting point. Basically the whole guitar had this black spray paint all over it, and this previous neck repair is made from a weak, lateral grained, spruce 2×4 with lots of wood putty. 🤮. Was about as solid as spaghetti and as aesthetically pleasing as roadkill. The top of the body – where the pick guard was. Yup, more wood filler putty. Who would do that?!?!The neck was already detached when I got it, here’s what I was looking at. Maker’s stamp. Manufacturer date stamp. In the humidor for a week or two before starting. Yup, that’s the back of the body – sprayed black. 😖Even the fretboard had black gunk all over it, along with deep finger grooves and worn frets. The only option was to pull all the frets, sand the fretboard to remove the black spray paint and level the board, then re-fret. More black paint. I assume this is the bullet hole from where someone unsuccessfully tried to put this guitar out of its misery. Will have to see about patching that. Starting with a plug of South American mahogany. Much yellower than the rest of the body, but I wanted that contrast. Hand shaped to fit the not-so-round hole. And not bad. Prepped for sanding. Sanded out quite nice. Pick guard area not perfect, but was really rough under the putty, so a decent result. Body looks great though. Varathane Diamond coat spray applied. Satin finish. Okay, I dare you to tell me that doesn’t look awesome! Can you imagine spray painting that mahogany black?!? I’m still speechless about that. Now to see about fixing this neck. You can see that the weak spruce was also screwed onto the neck with giant construction screws. Wow. The wood was so fragile that it just flaked all off. There’s a reason they don’t build necks out of spruce, especially with the grain running the weakest direction. No fancy scarf angle tools …. just a belt sander, a reasonable eye and a ruler. Now to figure out how to build something to fill that missing part. That, my friends, is a piece of Maple deadfall that I cut with a circular saw and smoothed on the belt sander. Rough shaped with a jigsaw and a lot more belt sanding. Maple is hard man, pretty much wore out a belt. Okay. Ready for the next steps. free-hand drew the slope and made a line for dead centre down the neck. Since I had to pull off the fretboard to repair the neck, I decided to router out the neck and put in a modern dual action truss rod. Rough sanded on the belt sander. Finish sand by hand. Home made router jig for my Dremel. Learned this from YouTube … use two-sided carpet tape between the top of the neck and the bottom of the jig so doesn’t slide around. Naturally I learned that only after I had my first little slip up. Alright though, I’ll hide the misstep with peg head overlay. Glue fretboard back on. I know the preferred method is to use properly radiused fretboard clamps, but I don’t have any and they are outrageously expensive for the occasional hobbyist like me. This is a very old heavy duty aluminum level I found in grandpas old work shop – grandpa quit woodworking in the 1980s and this thing was in his workshop probably for decades before that. Heavy, solid and truly flat. This helped to ensure the neck was straight and true as the glue dried, correcting the big warp it had. Now that the headstock is finally fixed and the fretboard is back on, I’m laminating a piece of Granadillo peg-head overlay to give it a nicer appearance. Didn’t realize how hard this type of wood is though. It took hours to shape it to the headstock contour. Every bit of contour hand filed and sanded. I did splurge on a decent rasp for this though. My existing files (which also came out of grandpa’s old shop) we so used and dull that they barely scratched this granadillo. And time to spray. Neck angle corrected (like 3 hours of trial and error fittings), and finally glued into the dovetail. Granadillo looks alright I think for that headstock. Fret levelling, nut and saddle making, and final setup.
AND NOW FOR THE REVEAL…
Thanks for looking. This one almost beat me, but I won. Be well all!!
I enjoyed seeing this resurrection so much! You are like Guitar Jesus because this one was so deep into guitar hell that I can barely believe you did it! Amen Brother!
Excellent salvage job. Can’t imagine why anyone would do that to any guitar not to mention a Guild. On Reverb these things run over $1K USD so it’s a more than decent guitar.
Hi Grant! Hope you’re well–all is well here. Do you still have this guitar? If so, I want to see if I can get you a pickguard from eBay France. It would be my gift to you if you would use it on this beauty you rescued. Let me know what you think. I’d love to see you post that updated pickguard to your blog. Cheers! Drew


I enjoyed seeing this resurrection so much! You are like Guitar Jesus because this one was so deep into guitar hell that I can barely believe you did it! Amen Brother!
LikeLiked by 1 person
Excellent salvage job. Can’t imagine why anyone would do that to any guitar not to mention a Guild. On Reverb these things run over $1K USD so it’s a more than decent guitar.
How does it sound when you play it?
LikeLike
Sounds like crap when I play it …. pretty decent when someone else is playing it.
LikeLike
Hi Grant! Hope you’re well–all is well here. Do you still have this guitar? If so, I want to see if I can get you a pickguard from eBay France. It would be my gift to you if you would use it on this beauty you rescued. Let me know what you think. I’d love to see you post that updated pickguard to your blog. Cheers! Drew
LikeLike