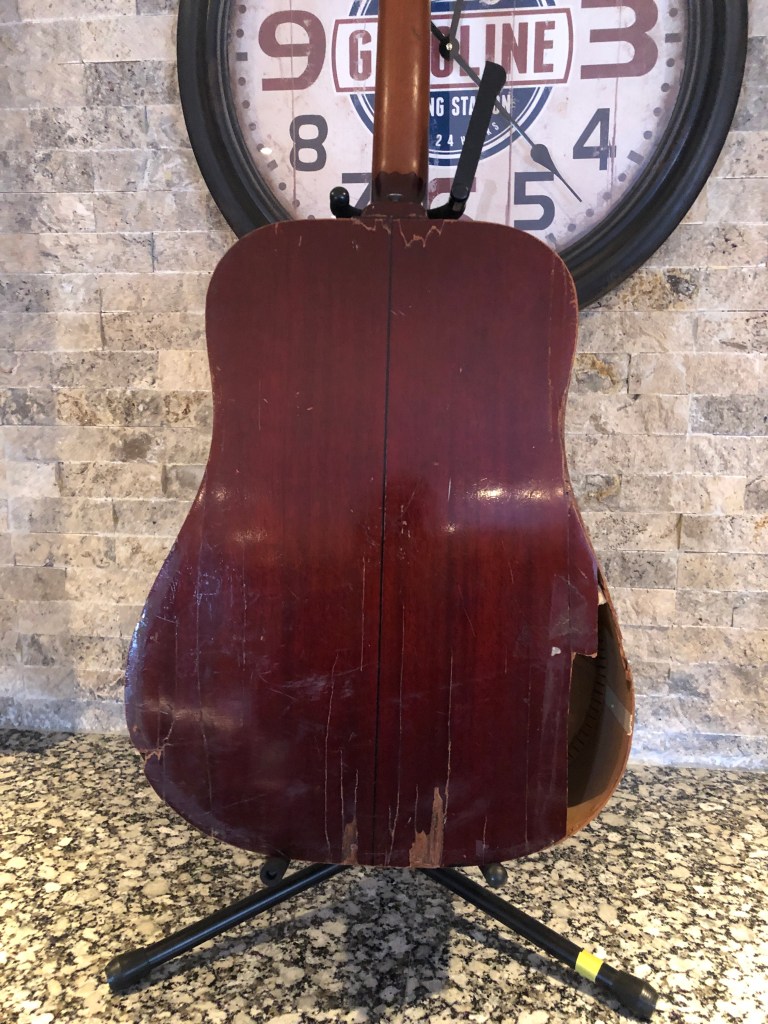
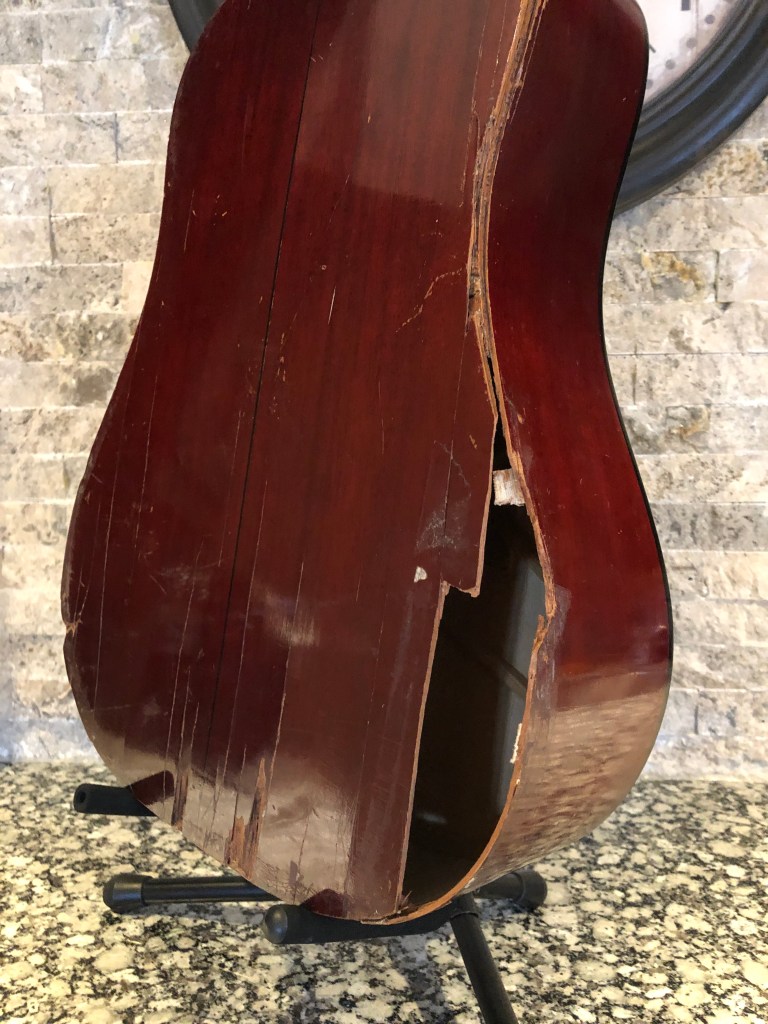
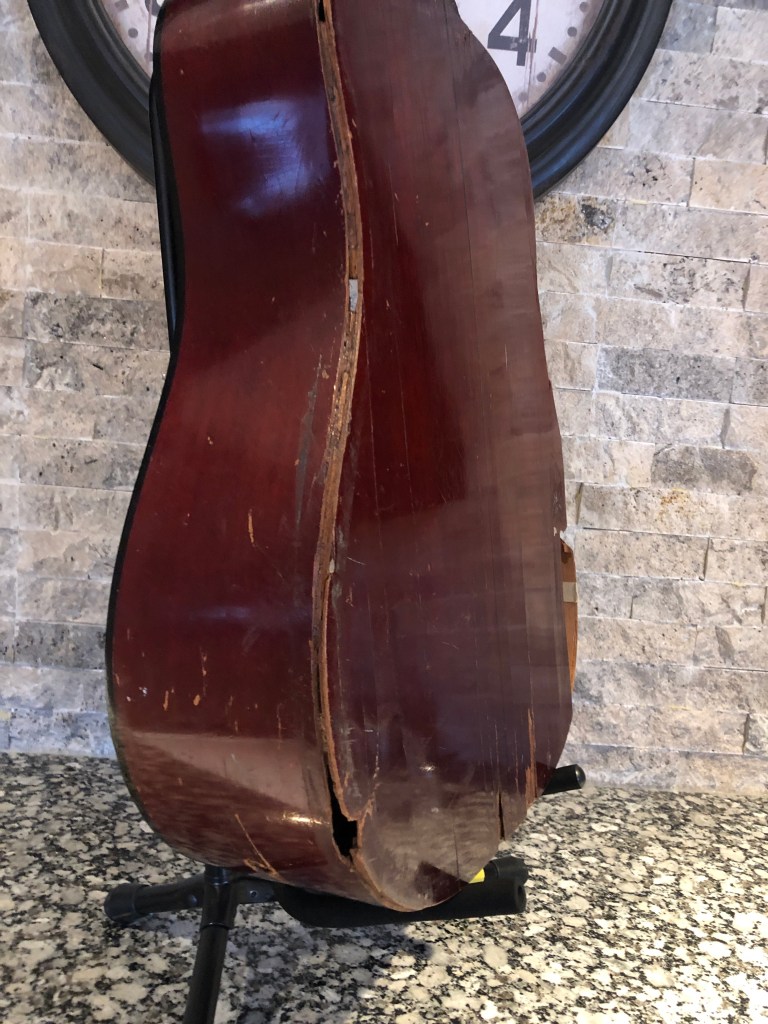
Not long after that radio show aired in CBC, I got a message from someone asking if I’d be willing to try fixing this guitar for them. The owner has had this guitar for many years, and it was pretty badly broken when he got it. He told me that despite being held together with scotch tape, it was still one of the best sounding and playing guitars he had ever owned (and he’s owned all the big named brands). After many years of being taped together though it finally became almost unplayable. He was willing to spend some money on repairs, but didn’t want the back replaced, only patchwork repaired and neck angle corrected, so no legit luthier would take the job. So – the “lost cause” specialist steps in to see what can be made to happen.
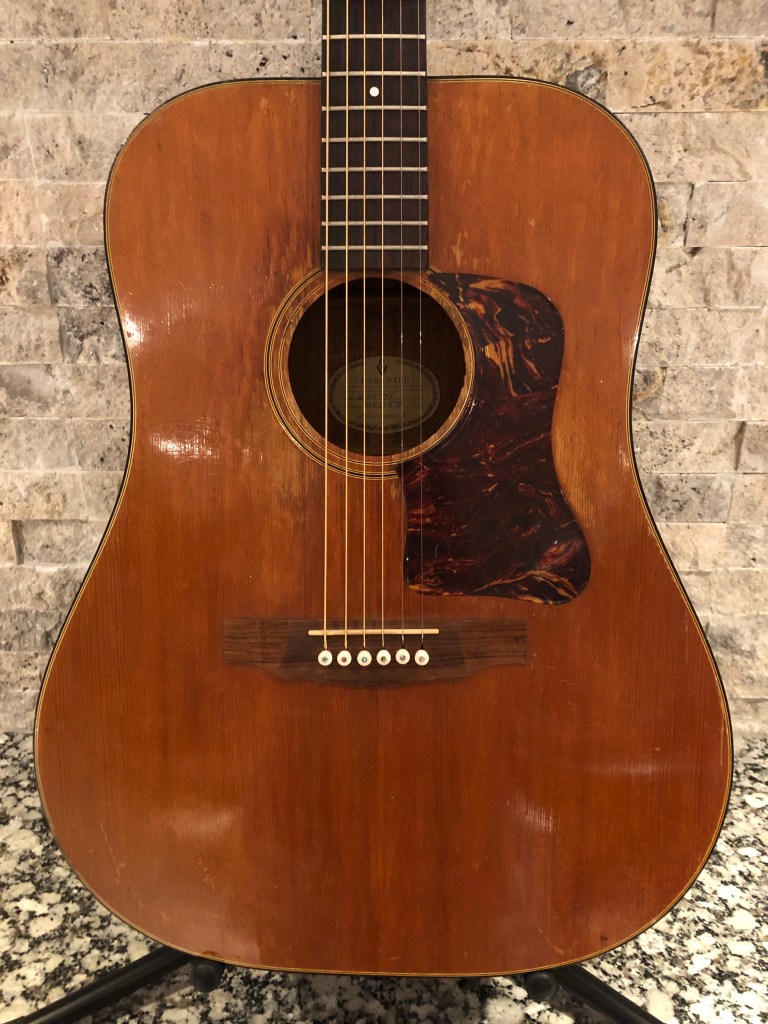
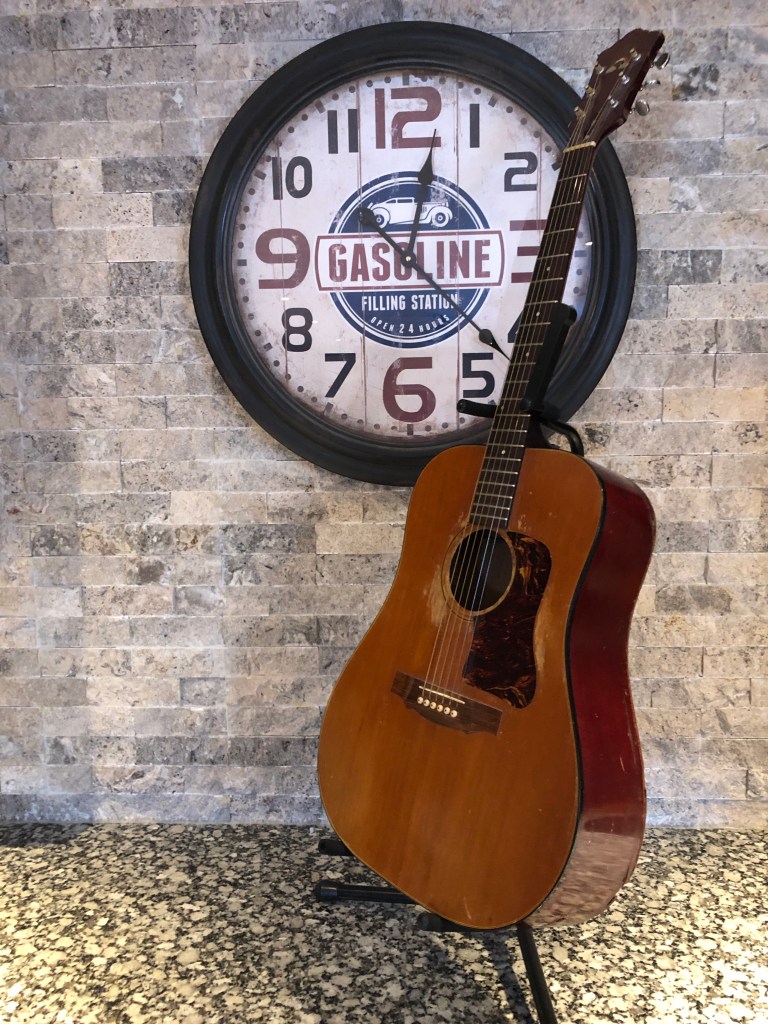
Here are the BEFORE pics.
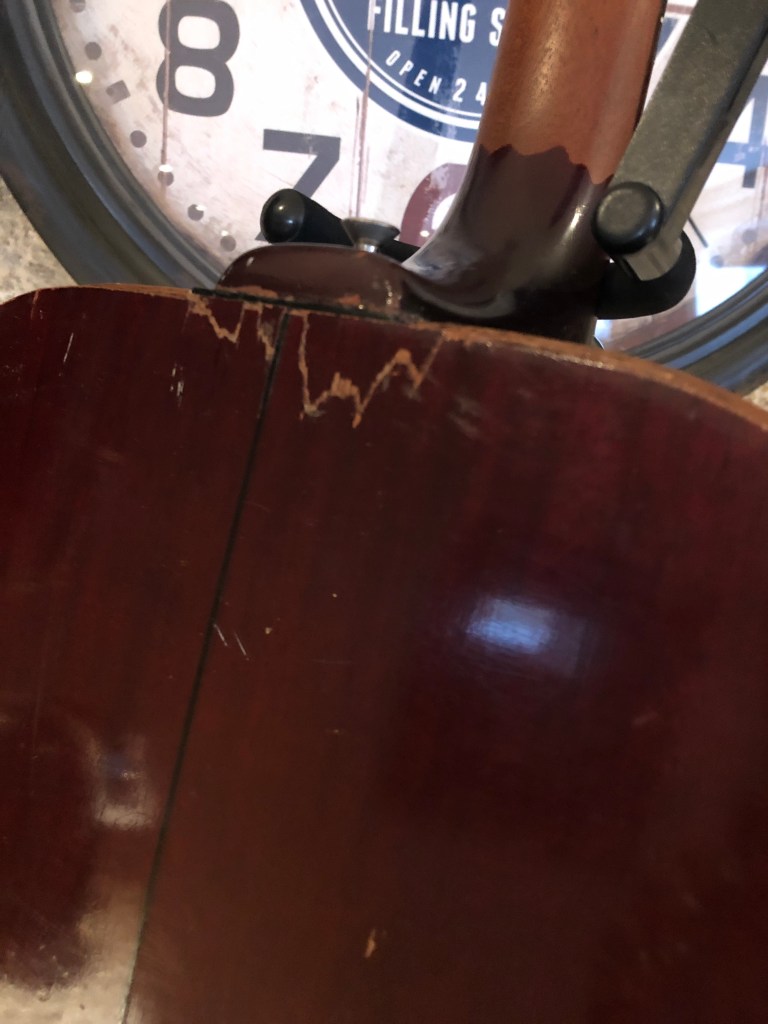
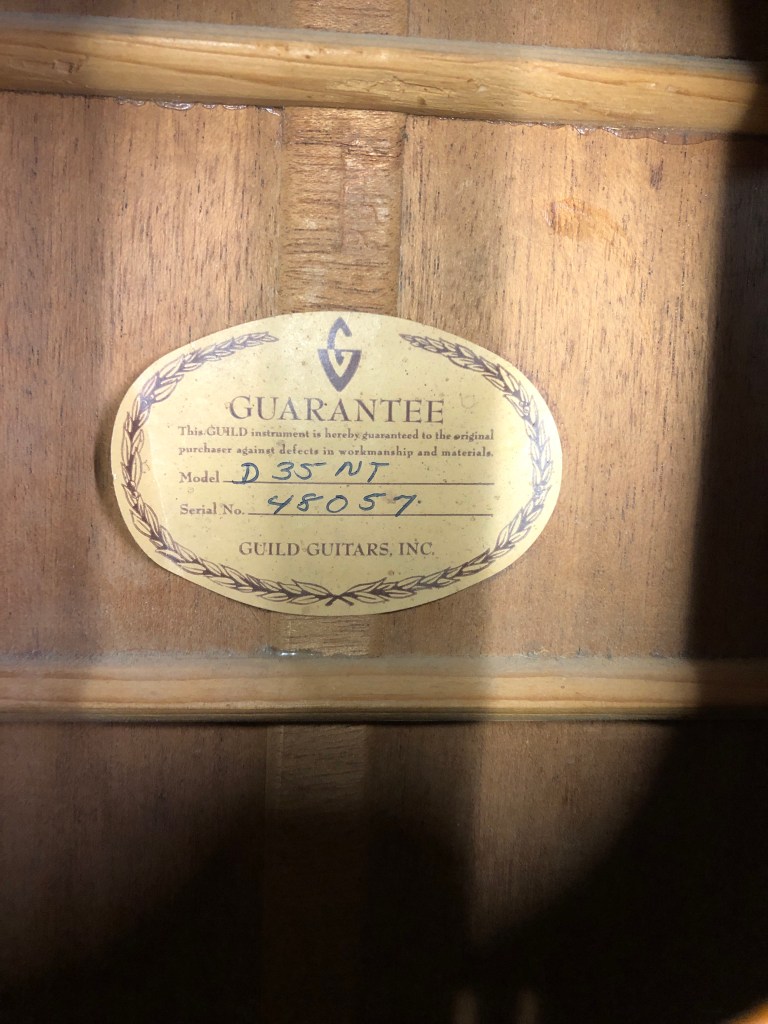
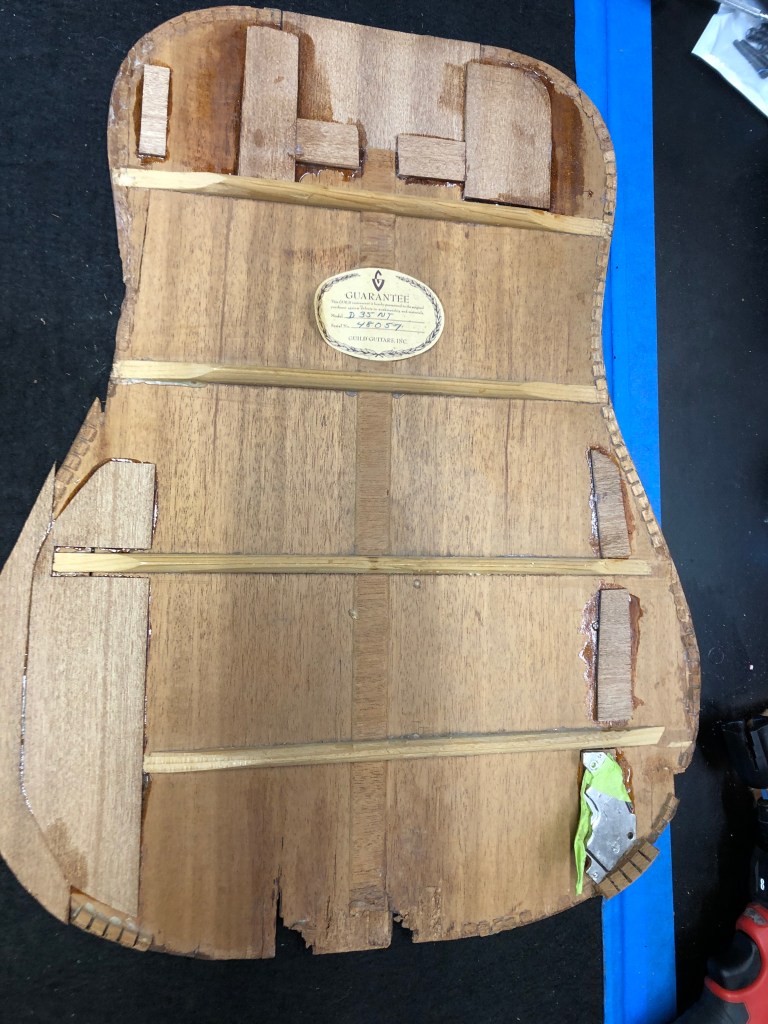
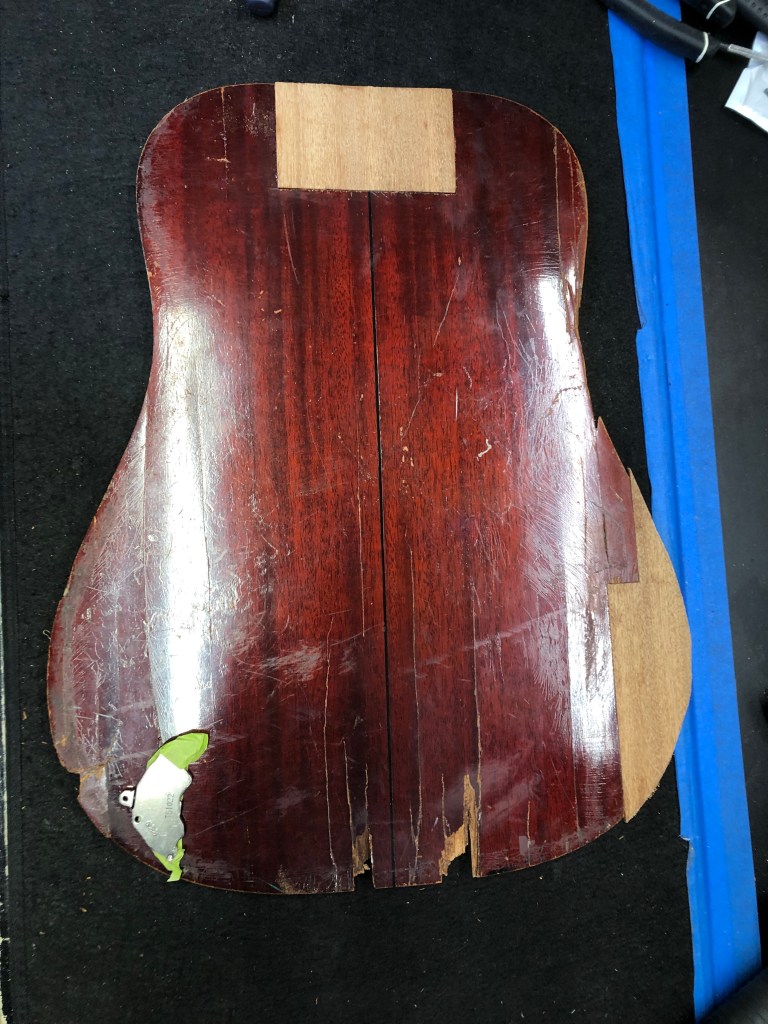
Rescue: Stage 1: remove back, try and maintain as much as possible. This was difficult because, at some point in history, the back had been re-glued to the neck block and tail block with epoxy. You cannot remove that stuff. You’ll see I had to cut out pieces of the back in those places and then chisel the epoxy off the blocks.
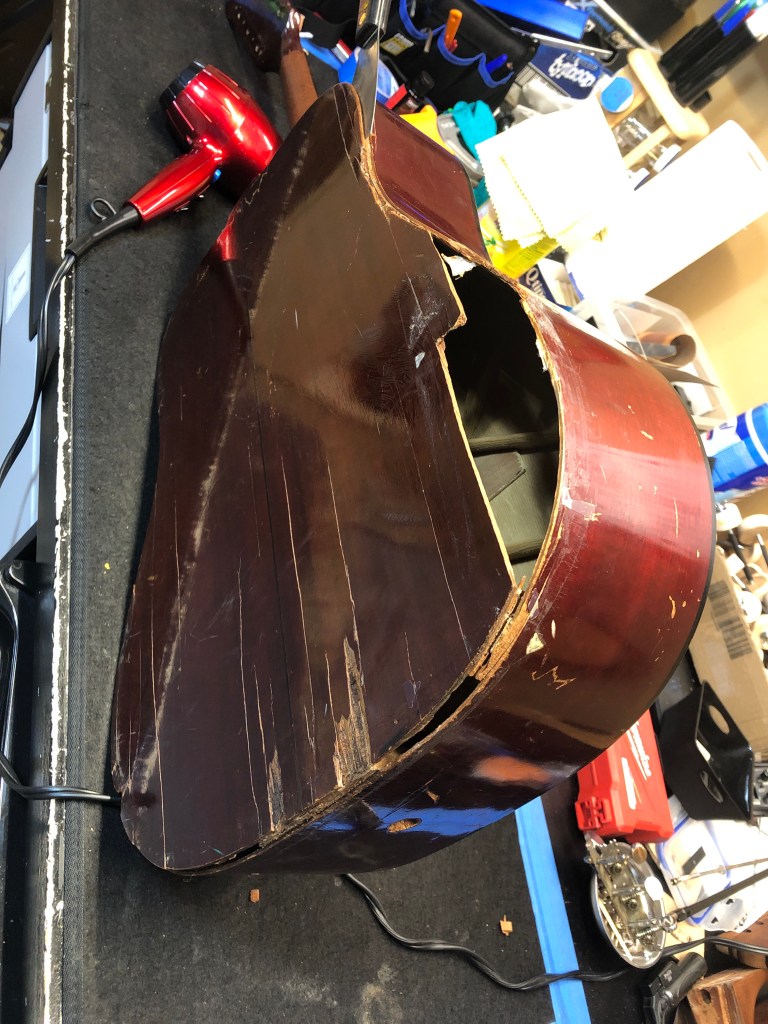
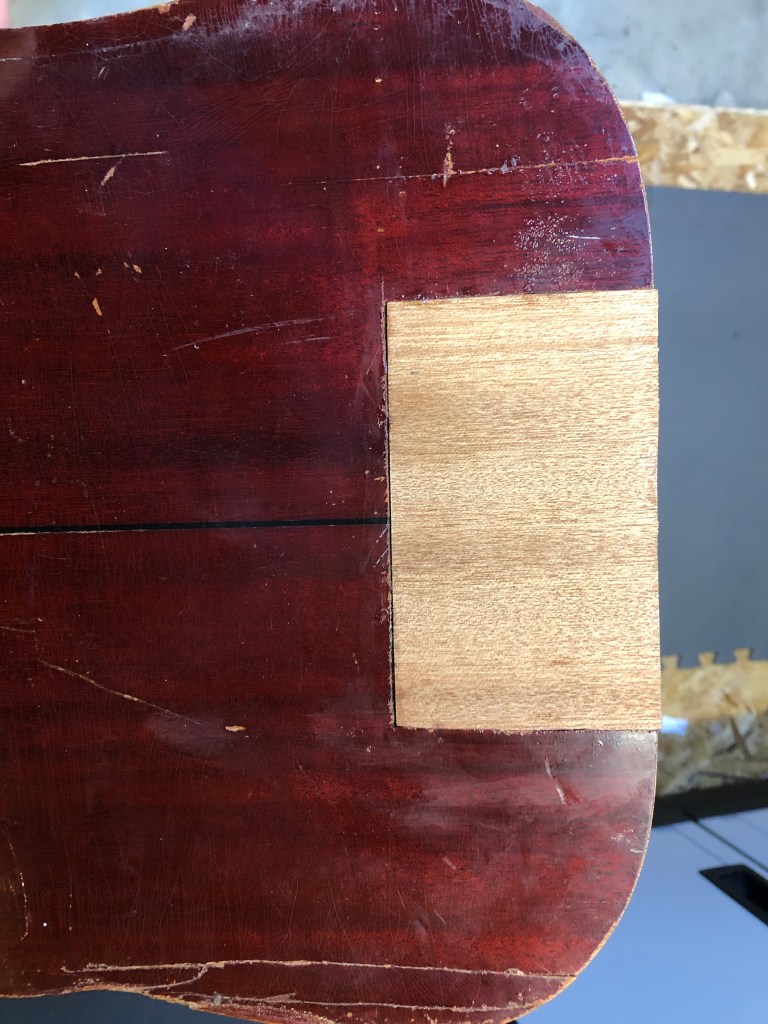
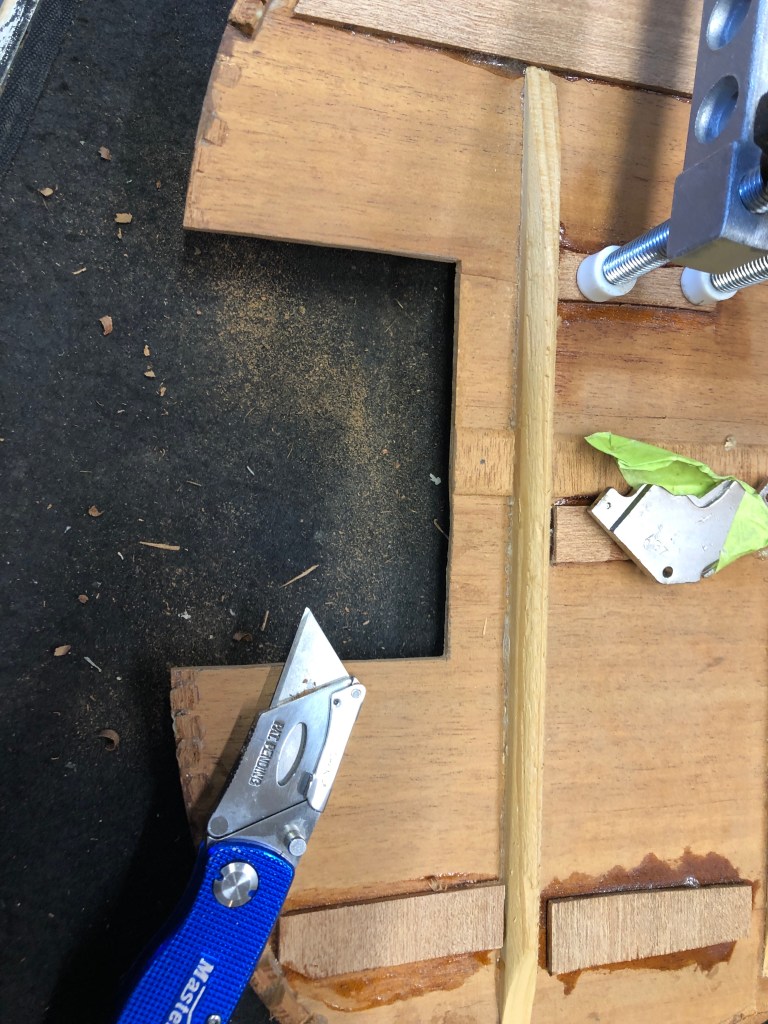
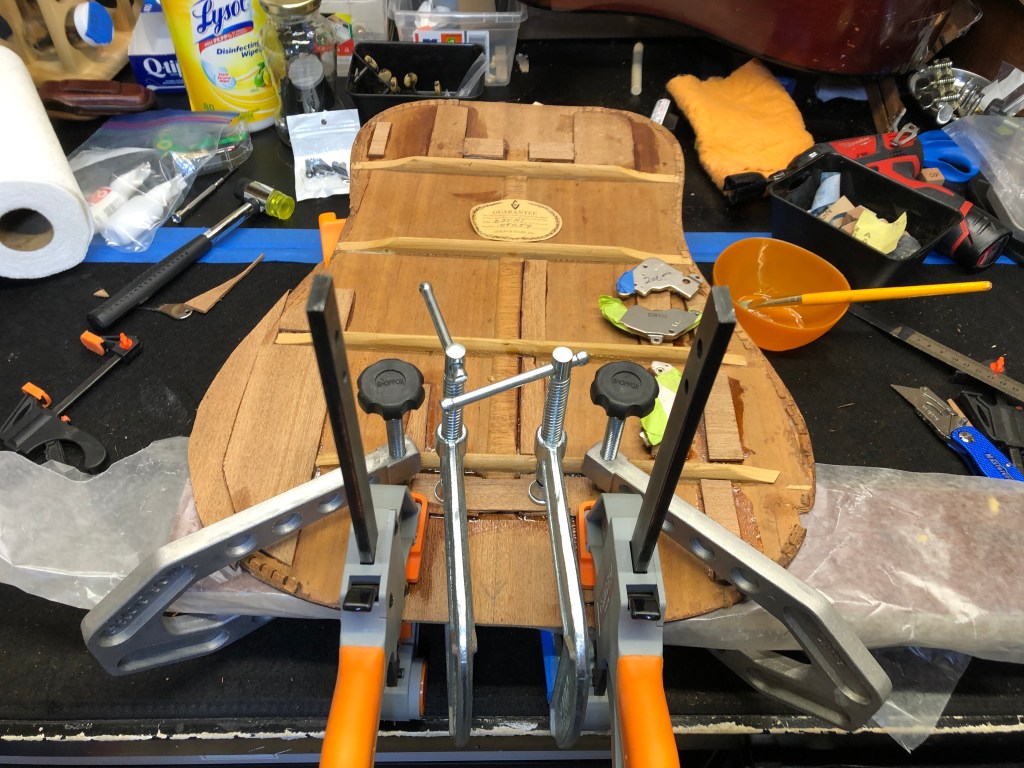
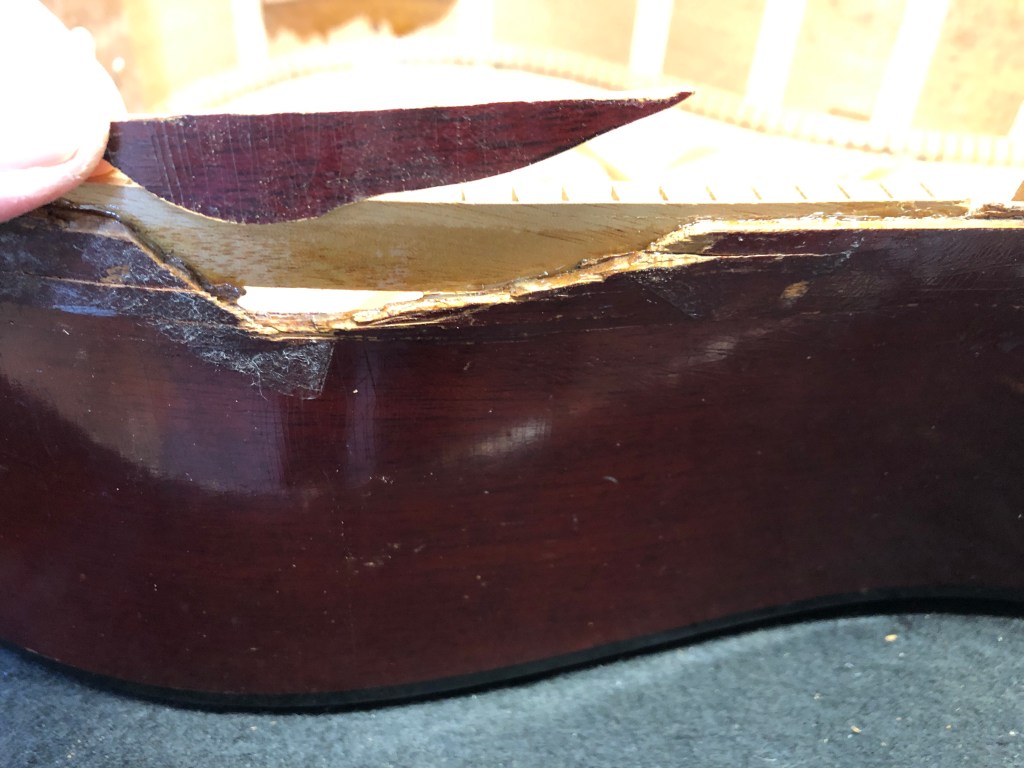
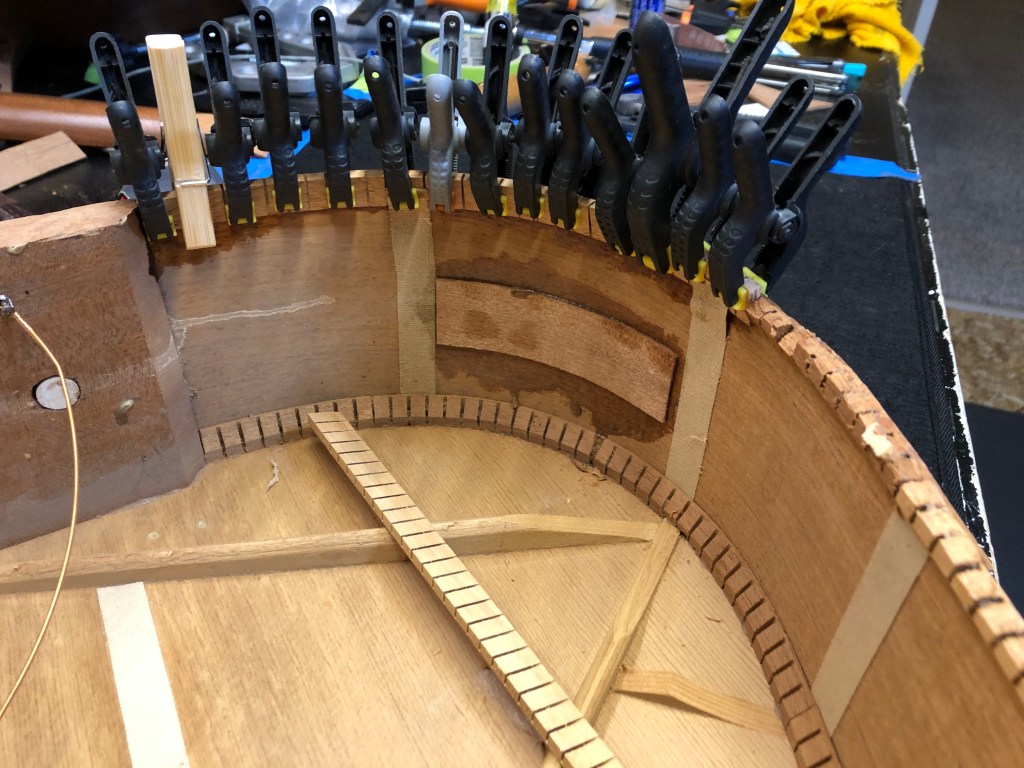
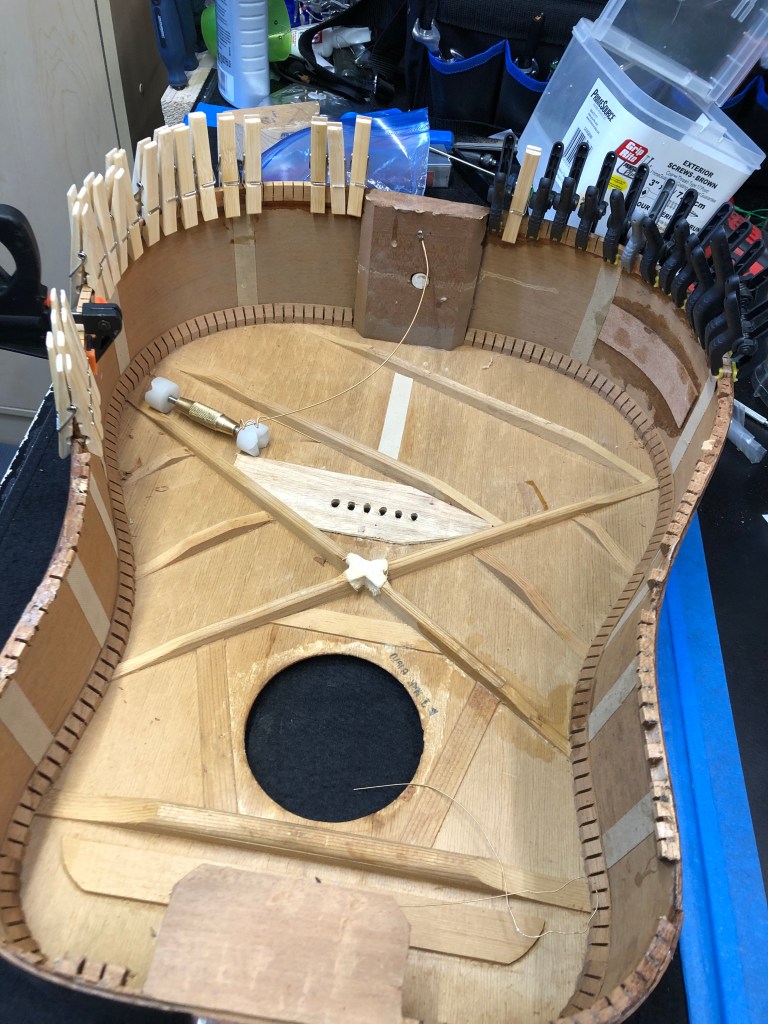
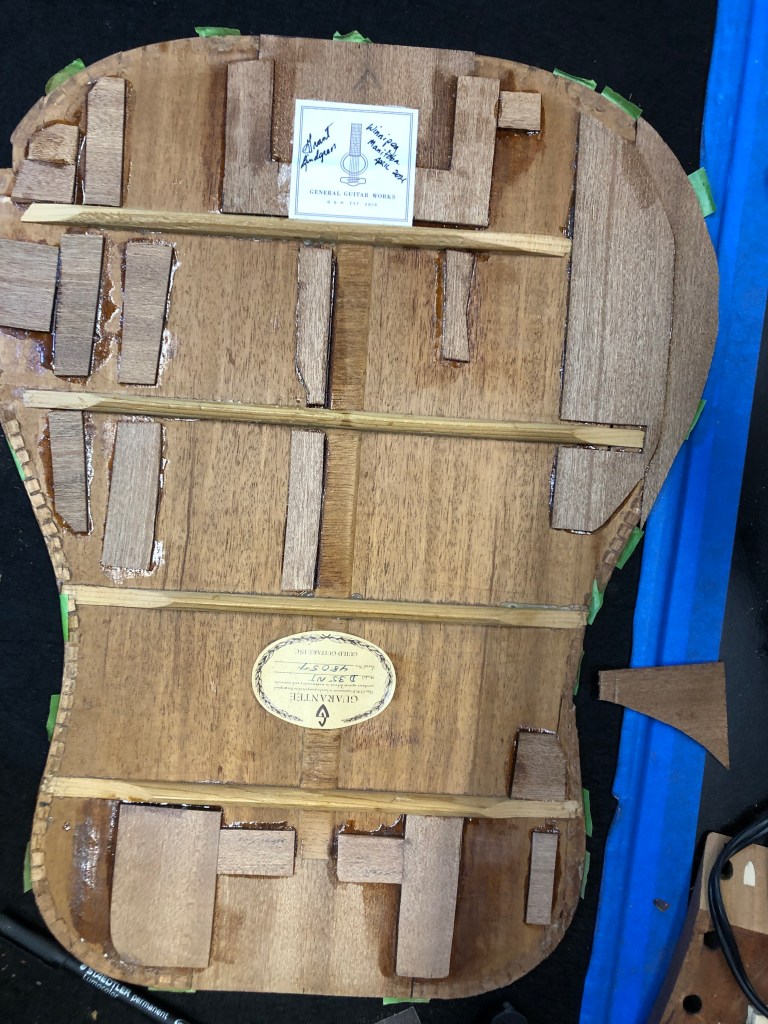
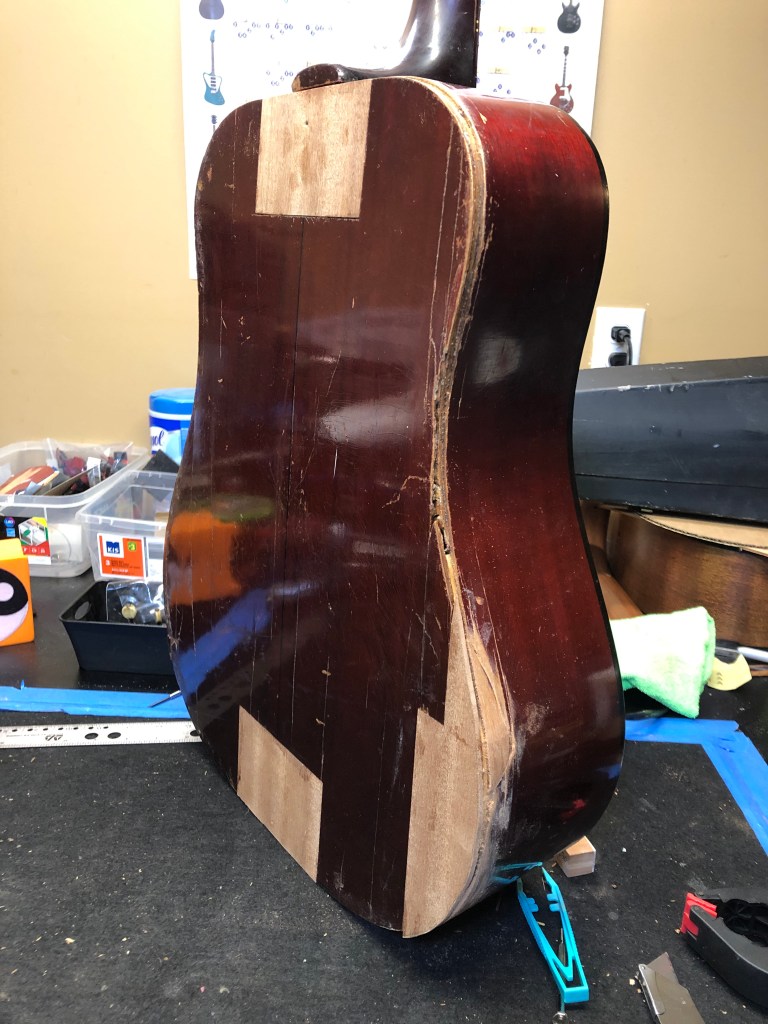
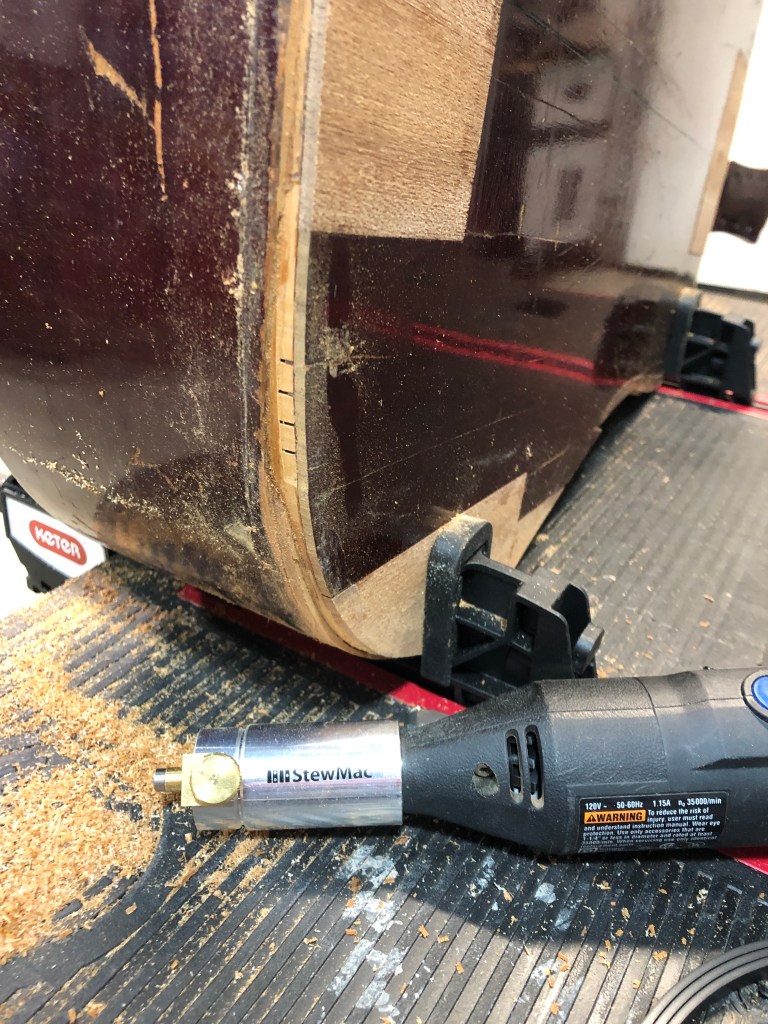
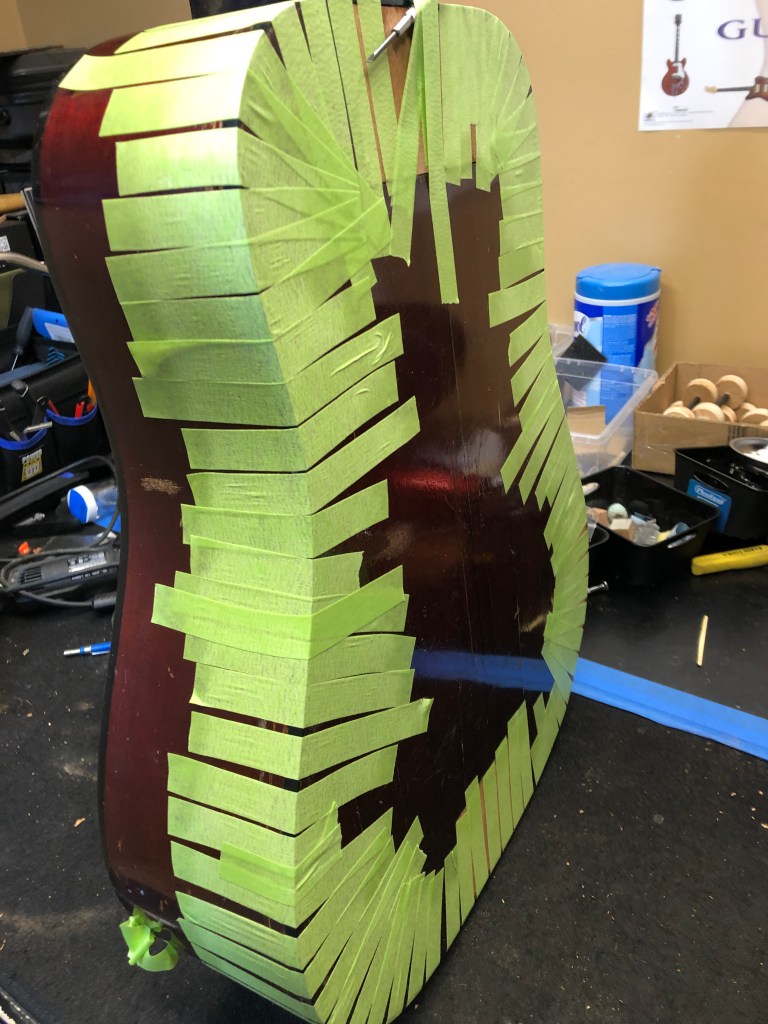
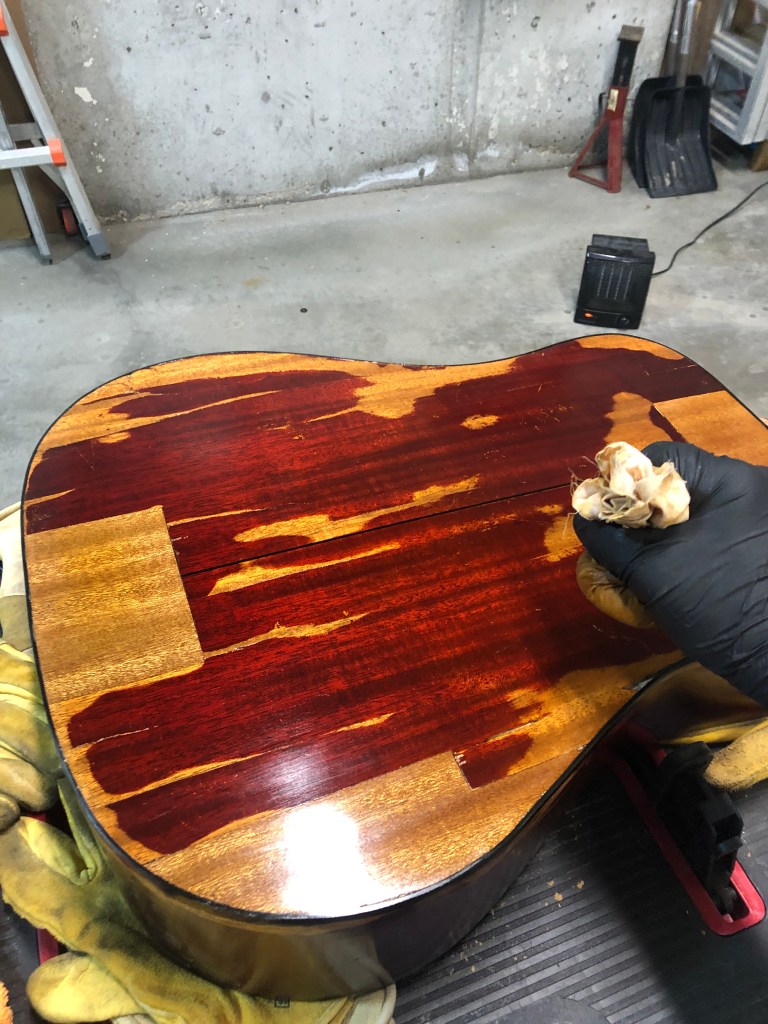
The top is in very good condition. That epoxy is terrible stuff on an instrument. 👎Cut new pieces of mahogany to fit and brace. Should look better when smoothed and finished. Now the bottom corner. Cardboard template from my 1975 Guild (see previous post). Cut some more mahogany to fit the missing piece. It’s kind of like making my own jigsaw puzzle. Glued in and braced. Kind of like that. Rough cut to shape with a jigsaw. Like that. Cut out the broken wood from the tail block. As mentioned in previous posts, I have very few luthier grade tools, or even and good woodworking tools …. this was done with a sharp box cutter and lots of patience. The upside is that I had lots of control over the precision of the cuts. Patched, glued, braced, clamped. Like that. Now to fix the sides – starting with the “bullet hole”. Like that first, then plugged with a disc of mahogany later. Giant hole where the end pin was supposed to be. Plugged and ready for finishing. The piece was missing. I made a replacement piece. Not bad for doing it by eye with nothing but a knife, files and sand paper. Replacing all the missing kerfing. And more kerfing. Note the neck block – chiseled and sanded free from the epoxy. What a miserable job that was!Ok, granted this looks pretty terrible, but the whole back was a one heavy wind away from falling completely to pieces. All the breaks were cleated and braced with mahogany. I would normally ever use such thick or wide pieces for a cleat, but this really needs the structure. And….. back glued and clamped in place. Binding tape used to add uniform clamping pressure all the way around. HERE is where I fixed the neck angle. The neck joint was super solid and I didn’t want to disturb the dovetail joint. So instead of a traditional neck reset, I just bent the whole upper bout a couple millimetres inward, leaving some overhang of the back at the neck and tail. I was going to have to re-router the binding channel anyway. Back together. Ready for router and binding. One of my very few luthier tools splurges. Highly recommend this tool for the occasional hobbyist. Binding goes on. Letting the glue dry. Bound and ready for sanding. Need everything smooth. Sanded smooth as glass and now applying a natural shellac finish in French polish technique. Tried to keep as much original stain as possible while still being able to make it smooth. Delicate balancing act.
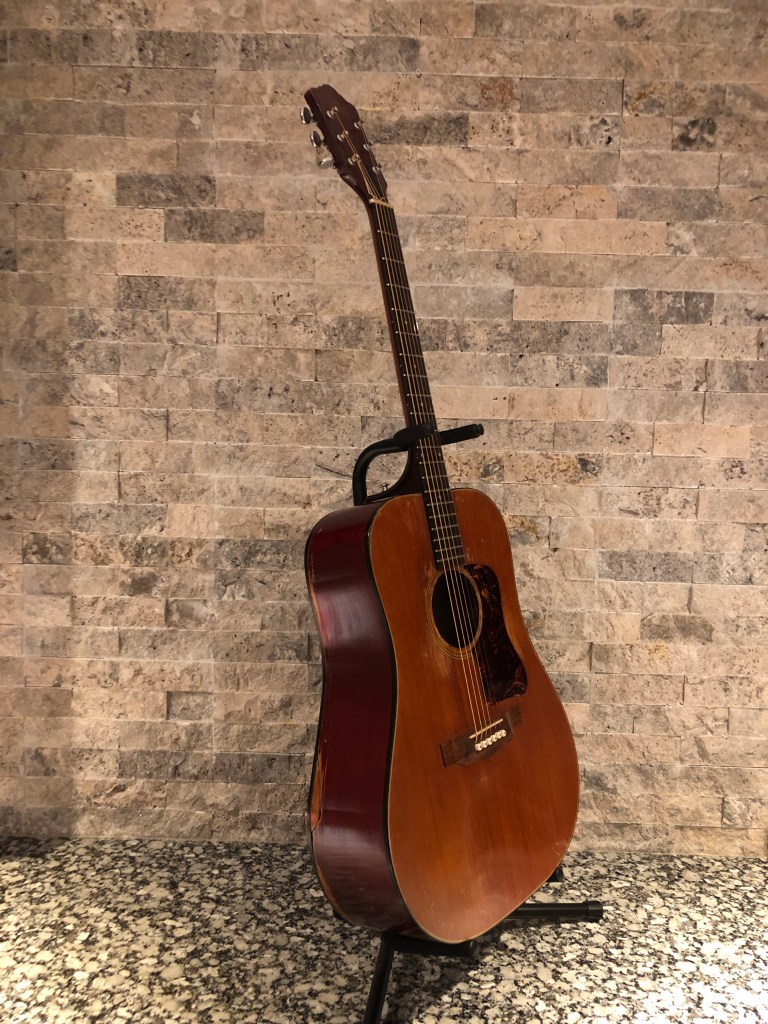
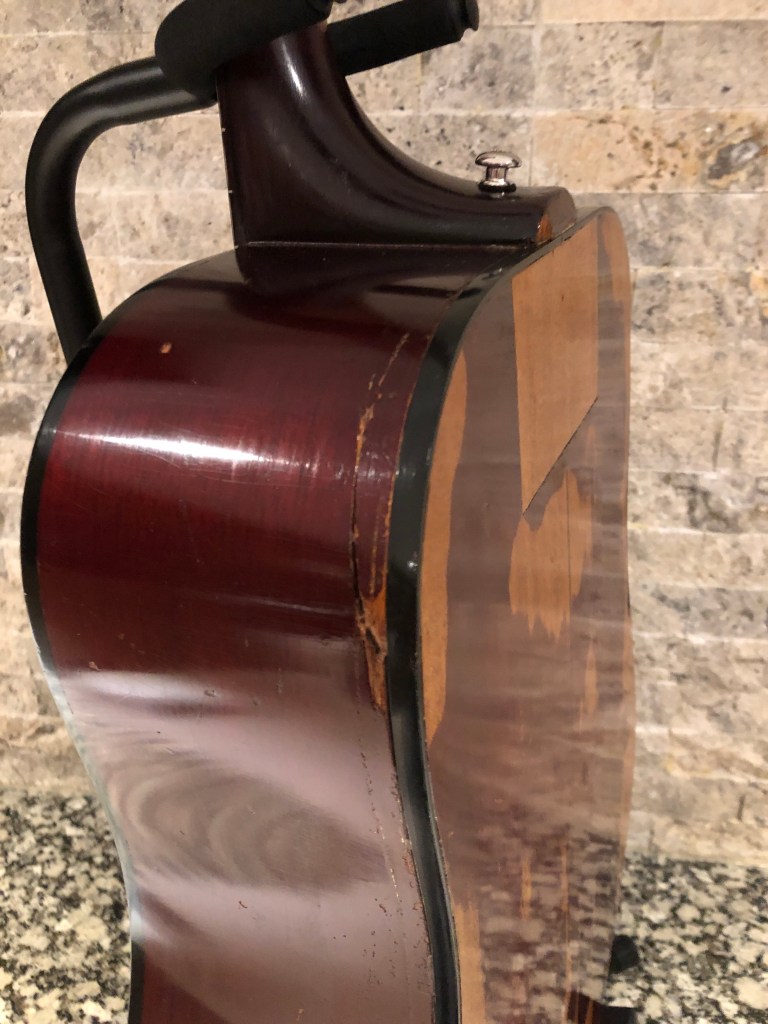
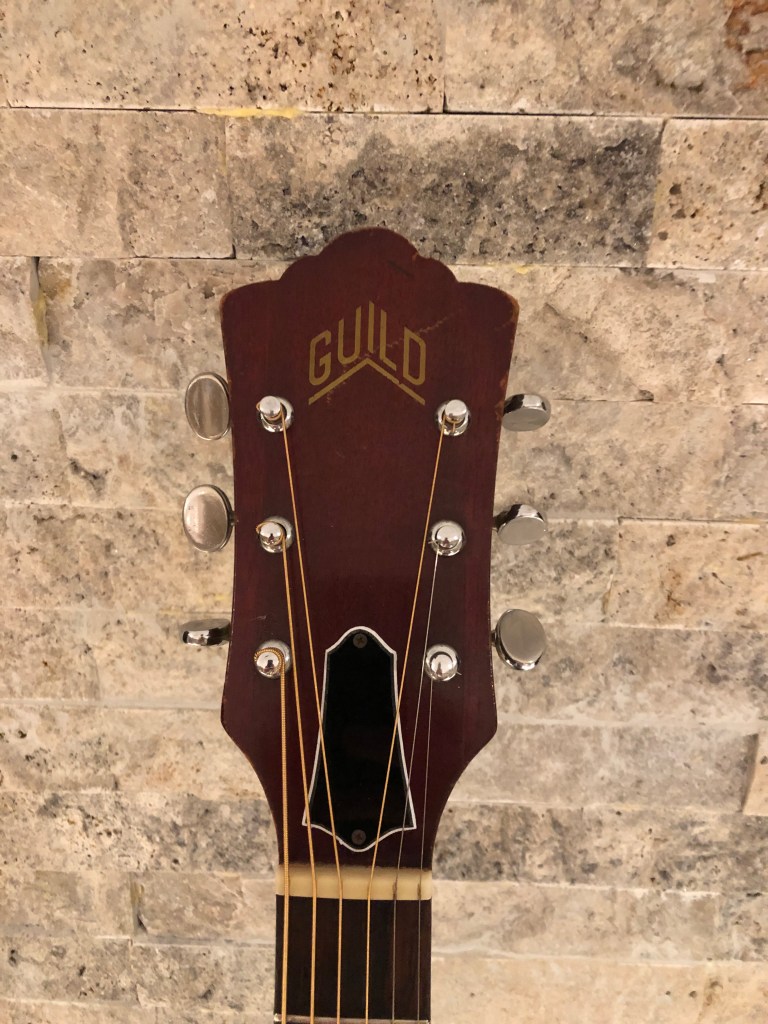
AND NOW FOR THE REVEAL….
EPILOGUE:
The owner of this guitar was absolutely thrilled with the final product. He said it far exceeded what he was expecting – in looks, sound and playability. He says plays better than it ever had. I’m going to try and upload a sound clip, because you have to hear it to believe it. If it works there will be a link to a short video at the end of this post. Check it out.
What an amazing rebuild ! You’ve got the passion and talent ! Beautiful save ! Thank you !
My Guild D-35 # is 47505 you think it’s the same year ? Really enjoyed that.


Wow, what an incredible “save”.
LikeLike
Terrific save of the back and everything else. So much character! Sounds amazing
LikeLike
I like the “General Guitar Works” label
LikeLike
Wow was that guitar ever in rough condition. Sure sounds sweet !
LikeLike
What an amazing rebuild ! You’ve got the passion and talent ! Beautiful save ! Thank you !
My Guild D-35 # is 47505 you think it’s the same year ? Really enjoyed that.
LikeLike
Both vintage guilds I’ve worked on had a date stamp on the inside of the guitar near the sound hole. Use a mirror and see what yours says.
LikeLike